
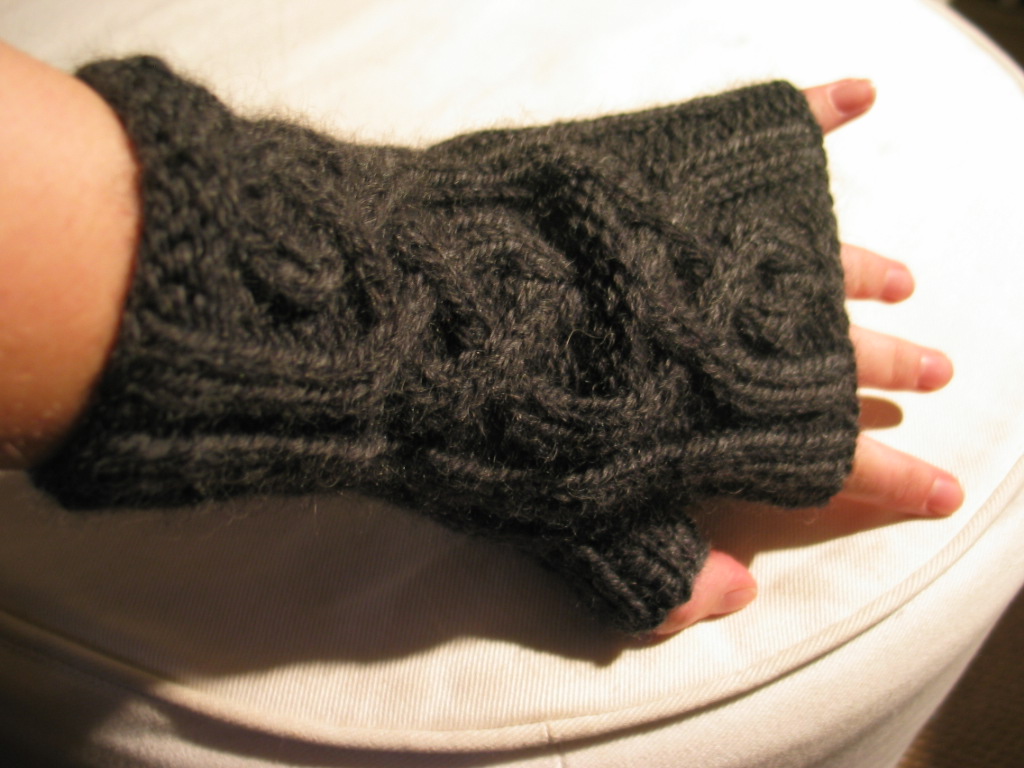
half mitts with viking inspired cables - in English
(Diagram updated November 19 2007)
A mitten that lets you do what you need to do in mindnumbing wet cold. Made for a biologist friend who was out measuring grass (!) in the pouring autumn rains...
This IS my first pattern written up, and I wrote it the way I knit it... so please let me know if you find obvious errors and let me correct them. Thank you!
Yarn: Two skeins Garnstudio's Alaska color 5
Needles: one set dpns 3,5 mm (I'm a very loose knitter so you might need 4mm needles. It's supposed to be quite tight)
Cast On 46 sts on 3 dpns according to:
Needle 1: 15 sts
Needle 2: 16 sts
Needle 3: 15 sts
On needle 1:
ALL rows on left mitten are knitted according to
P1 [K2, P2] 3 times, K2
On right mitten ALL rows except row 35 are knitted like above.
On row 35: p1, K2, P2 - then K8 on waste yarn. Place these 8 sts back on left needle and knit again. K last 2 sts.
On needle 2:
Diagram 1 for left mitten.
Diagram 2 for right mitten.
On needle 3
ALL rows except row 35 on left mitten are knitted according to
K2 [P2, K2] 3 times, P1
On right mitten ALL rows are knitted like above.
On row 35: K2 - then K8 on waste yarn. Place these 8 sts back on left needle and knit again. P2, K2 P last stitch.
Bind off using the simple crochet bind off.
Thumb:
Pick up 8 sts under and 7 sts above the sts placed on waste yarn. Then pick up extra sts in the sides of the thumb for a total of 20 sts. (Suggested: 3 sts towards the palm of the hand and 2 on the outside oif the thumb) Distribute these sts on 3 dpns and try to match the ribbing of the mitten up into the thumb. K2, P2 for 8 rows befor binding off.
Blocking: Fasten the loose ends. Then press the mittens in a steaming hot, wet towel. This will felt the surface a little bit, making the mitten more water resistant.
Diagram:
Click the image for bigger version!


Explanation of diagram:
increase 1: (leans to the right) Lift one stitch from one row down and knit it. Use the stitch under the one you're about to knit (next stitch on left needle)
increase 2: (leans to the left) Lift one stitch from one row down and knit it. Use the stitch under the last stitch you just knitted (the last stitch on your right needle)
decrease 1: (sl1, k1, psso) slip 1 as if to knit. Knit 1 and pass slipped stitch over.
decrease 2: knit 2 together (K2tog)
1 comment:
Hello Visa Lisa:
I want to thank you for making your design available. It is beautiful and I can't wait to try it.
Blessings for your talent and generosity.
Anya
Post a Comment